To configure the team section you’ll have to create team member page and later configure it to display it from the customizer.
Configure In Advance Team Member Section
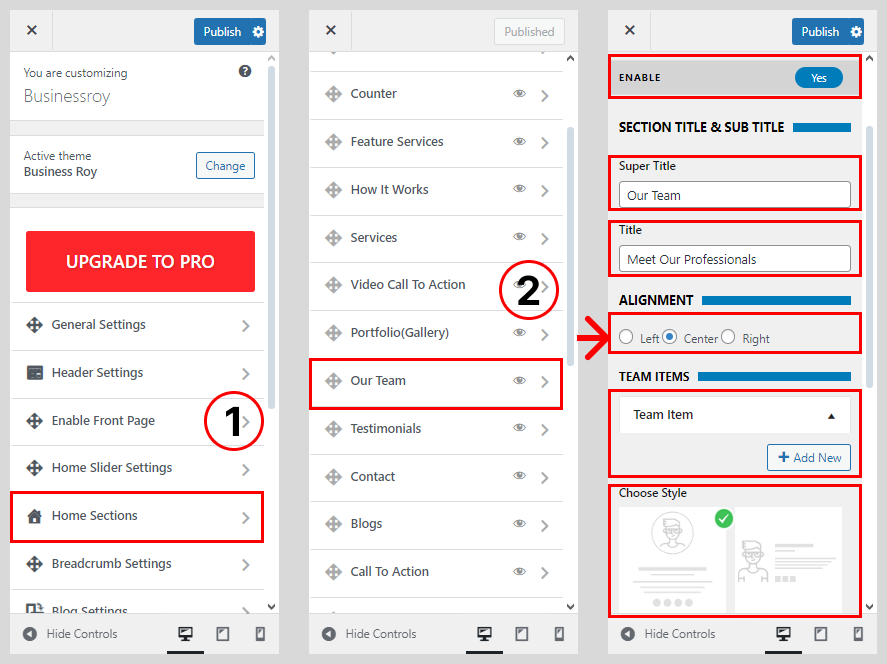
- Go to Dashboard > Appearance > Customize.
- Go to Home Sections > Team Section.
- Set ‘Disable Section‘ to ‘No‘ if you wish to disable Team Section on your home page else set the option to ‘Yes’.
- Set the Team Section sub-title under the ‘Sub Title‘ textarea field.
- Set the Team Section title under the ‘Title‘ text field.
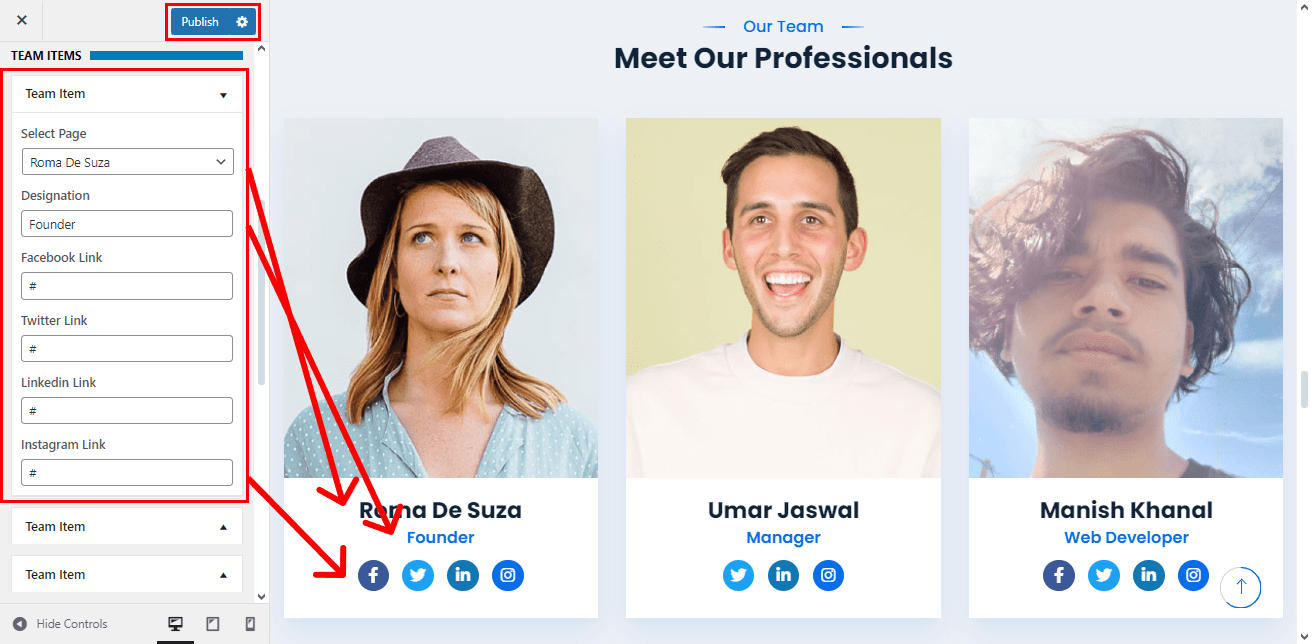
- Select the Team Member page that you’ve created for the Team Member 1 from ‘Select a page’ drop-down page list.
- Click on Team Item
- Choose the Team Style
- Set the designation for the Team Member 1 in ‘Team Member Designation’ Textfield.
- Set Team Member 1’s Social Profile Link (Facebook, Twitter & Google+ URL).
- Once done, click on the ‘Save & Publish’ button.
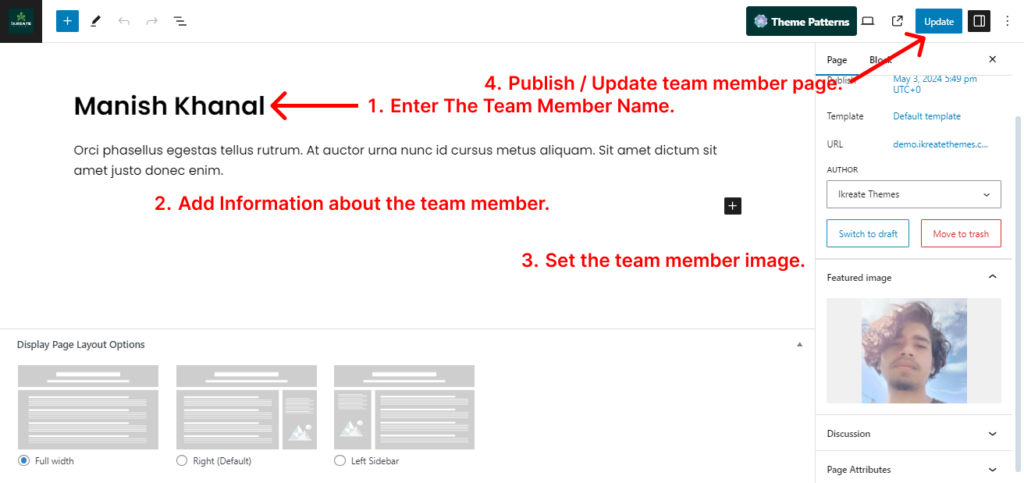
How To Configure Team Member Page
Create other Testimonial pages in the same way.
- Go to Dashboard > Pages > Add New.
- Enter the name of a client in the ‘title’ field.
- Enter the testimony of the client in the content area.
- Set the featured image for the client.
- Click on the ‘Publish/Update’ button.